Trace: • 1.1.x
Table of Contents
Mini Tutorial 
The goal of this tutorial is to quickly show how you can develop an application with Jelix 1.1.
Download and installation 
First, download the "developer" edition of Jelix. Jelix requires at least PHP 5.2 (See here a detailed list of requirements)
Then, unpack the archive file you have downloaded, with your archiver software companion. For example, with tar:
tar xzf jelix-1.1-dev.tar.gz
After this, you have a directory jelix-1.1/lib/ in which you'll find all libraries used by jelix, and jelix itself.
For the purpose of this tutorial, move jelix-1.1 folder in a directory of your web site. So that it will be accessible with a browser, at this URL for example: http://localhost/jelix-1.1/ (You can rename jelix-1.1/ as you wish).
Jelix scripts 
A script for command line, jelix.php, is available in the lib/jelix-scripts/ directory. This script allows you to create quickly different files of your application. Open a console and go into this directory :
   cd lib/jelix-scripts/        # under linux
   cd lib\jelix-scripts\        # under windows
You have to use jelix.php with the command line version of PHP. this script requires, as parameter, a Jelix command. Each command defines a number of required parameters and options.
To invoke a command :
php jelix.php --application_name command_name [options] [parameters]
To invoke help:
php jelix.php help // generic help, lists all commands available
php jelix.php help command_name // specific command help
Application creation 
Let's create the tree structure of your application using createapp command. Suppose your application will be named “example”:
php jelix.php --example createapp
As a result, you'll get an example/ directory, at the same level as the lib/ directory. Its content wil be :
example/
   modules/       the modules of your application
   plugins/       the plugins of your application
   var/config/    the configuration files of your application
   var/log/       the log files
   var/themes/    the different possible themes in your application
   var/overloads/  will contain the different files that you will redefine, from modules.
   www/           the root of the site
Module creation 
A module gathers a whole set of actions dispatched in controllers. At least one is necessary in an application. This is why a module is created automatically when you run createapp command.
Here is the directory which has been created:
 example/modules/
            example/                the directory of the module
              module.xml          file describing the identity of the module
              controllers/       the classes processing the actions
                 default.classic.php   a default controller
              classes/            your business classes and services
              daos/               the object-relational mapping files
              forms/              forms files
              locales/            locales files ("properties files")
                  en_EN/
                  fr_FR/
              templates/          templates of the module
              zones/              objects processing specific zones in a page
If you want to create other modules later, use createmodule command :
php jelix.php --example createmodule cms
It will create a module named “cms”.
First display 
Before displaying the start page of your new application, you have to be sure your web server has write access to directories temp/example and example/var/log :
For example, on linux (ubuntu or debian) :
   sudo chown www-data:www-data ../../temp/example ../../example/var/log
   sudo chmod 755 ../../temp/example ../../example/var/log
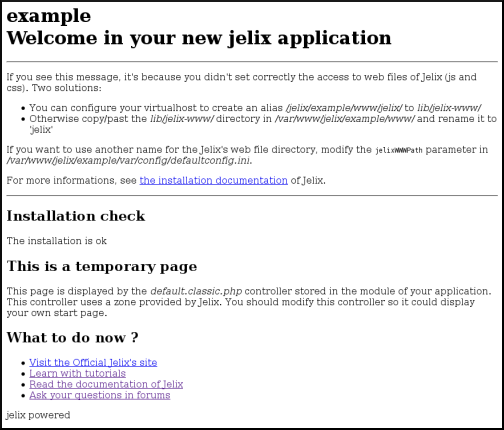
You are now ready for prime. Your application is accessible at this URL: http://localhost/jelix-1.1/example/www/. Enter this URL in your browser. you should see:
Noticed this message saying that a CSS file is missing ? Copy the jelix-1.1/lib/jelix-www directory into jelix-1.1/example/www by renaming it to “jelix” (on a dedicated apache server, it is better to create an alias). This directory is important because it contains some files needed by jForms or other components.
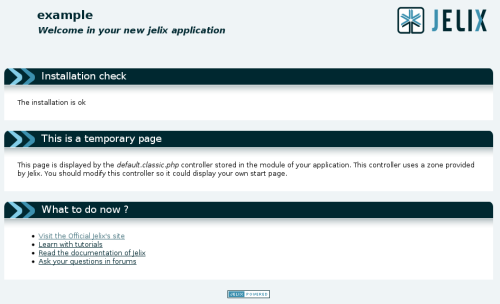
Now you should see:
If there are some error messages in the “installation check” section, fix them.
Implementing an action 
Let's implement a default action. An action is a process which generates a page. It is implemented as a method in a class called a “controller”. A controller can implement several actions.
Open example/modules/example/controllers/default.classic.php file:
class defaultCtrl extends jController {

   function index () {
       $rep = $this->getResponse('html');

       // this is a call for the 'welcome' zone after creating a new application
       // remove this line !
       $rep->body->assignZone('MAIN', 'jelix~check_install');

       return $rep;
   }
}
What this code means is that index action of default controller retrieves a jResponseHtml object through the getResponse() method by passing “html” as argument. After processing, the action returns this response thus indicating that its content must be returned to the browser.
jResponseHtml has a body property, which is a jTpl object. jTpl is a template engine provided by Jelix.
In the action code above, you see a call to assignZone() method. This means : get the content of the 'check_install' zone which is stored in the 'jelix' module, and assign this content to the template variable named MAIN (You will see what is a zone in details later). 'Check_install' is a zone which shows results of install checkings. If those results are ok, you don't need it anymore. delete this line so you will have this in your controller:
class defaultCtrl extends jController {

   function index () {
       $rep = $this->getResponse('html');

       return $rep;
   }
}
Response object 
a jResponseHtml object generates an HTML response (an HTML page). It automatically generates the <head> part of HTML, from some of its properties.
Let's define the title of the page. Add this in the index() method, just before returning the response object :
$rep->title = 'Hello World !';
Reload the page. The page title should now display accordingly in your browser title bar. But still your page contains this:
How is this possible whereas we don't define any content in our controller ?
We have seen before that getResponse('html') returns a jResponseHtml object. However, it could return another object for the “html” type. It could be an instance of a class inheriting from jResponseHtml and which set common things for all 'html' actions. Think about defining common CSS style sheets and JS scripts, your application main template etc. This class is very useful as you don't need to repeat this settings through all your actions. And because this is very useful, the createapp command creates such a class and a default template. it is stored in the responses/ directory of your application, and is declared in the configuration file.
Let's see the content of example/responses/myHtmlResponse.class.php created by createapp:
class myHtmlResponse extends jResponseHtml {

    public $bodyTpl = 'example~main';

    protected function doAfterActions() {
        $this->body->assignIfNone('MAIN','<p>no content</p>');
    }
}
This “customized” response assigns to its bodyTpl member the default template which will be used to generate the <body> content of all pages : “example~main”. This is the main.tpl file in the example module. “example~main” is called a selector. A Jelix selector is a shortcut to refer to a resource of a module. Here is the content of main.tpl:
   <h1 class="apptitle">Title for example<br/><span class="welcome">{@jelix~jelix.newapp.h1@}</span></h1>
   {$MAIN}
{$MAIN} is an instruction which says: display the content of the template variable named MAIN. {@jelix~jelix.newapp.h1@} is an instruction which says: display the localized string (a string which value depends on the lang) identified by the “jelix.newapp.h1” key and stored in the “jelix” module.
doAfterActions method is called after each action. In the example, it assigns "<p>no content</p>" to the MAIN template variable if this variable doesn't exist yet (so, if it is not set by the action).
Now you know why there is a content displaying on the start page. Now let's modify the template with this content:
<h1 class="apptitle">My web site</h1>

<div id="page">
{$MAIN}
</div>
And in the constructor of the doAfterActions method, we add an instruction to setup a CSS style sheet:
class myHtmlResponse extends jResponseHtml {

    public $bodyTpl = 'example~main';

    public function __construct() {
        parent::__construct();
        global $gJConfig;
        $this->addCSSLink($gJConfig->urlengine['jelixWWWPath'].'design/jelix.css');

    }

    protected function doAfterActions() {
        $this->body->assignIfNone('MAIN','<p>no content</p>');
    }
}
Now you see:
Your first content 
Let's define the content of our start page (in example/modules/example/controllers/default.classic.php):
class defaultCtrl extends jController {

   function index () {
      $rep = $this->getResponse('html');
      $rep->title = 'Hello World !';

      $rep->body->assign('MAIN',"<p>Hello !</p>");

      return $rep;
   }
}
So here, we put “<p>Hello !</p>” in the “MAIN” template variable. We now see:
Template of an action 
It should be more practical to put the content in a new template, dedicated to your action, for example in example/modules/example/templates/hello.tpl. So we have two templates: main.tpl which contains the main structure of the web site, and hello.tpl which specific to the action.
Let's create the hello.tpl in the templates directory:
<div class="monbloc">
<h2>Message</h2>

<div class="blockcontent">Hello {$name} !</div>
</div>
"{$name}" is a variable template. Now modify the controller:
   function index () {
      $rep = $this->getResponse('html');
      $rep->title = 'Hello World !';

      $tpl = new jTpl();
      $tpl->assign('name','Me');
      $rep->body->assign('MAIN', $tpl->fetch('hello'));

      return $rep;
   }
Notice the use of the $tpl object. The “fetch” method generate the content of the given template. The 'hello' string is a selector of course.
You see now:
Retrieving parameters 
It would be interesting to be able to indicate the name to display in the template, as a parameter of the url. We get a parameter value with param() method :
   $name = $this->param('name');
   $tpl->assign('name', $name);
Now type:
http://localhost/jelix-1.1/example/www/index.php?name=Max
You will see:
URLs 
To execute a specific action, you should add in the url the module name, the controller name, and the method name of the action. For our example, we can type:
http://localhost/jelix-1.1/example/www/index.php/example/default/index
If it doesn't work, perhaps your server is not configured to accept pathinfo. You can then configure it or activating the “simple” url engine in the configuration of the application, and then type:
http://localhost/jelix-1.1/example/www/index.php?module=example&action=default:index
See the manual for details.
In our example, the url indicates the default action of the application. which is specified in the example/var/config/index/config.ini.php file, in startModule and startAction options:
startModule="example"
startAction="default:index"
You can change it later if you want.
You can also change the “DocumentRoot” of the web site and to set it to the jelix-1.1/exemple/www directory, or move the content of the example/www to the root of your web site.
Conclusion 
This were the first concepts of Jelix. You can continue to discover it by following the main tutorial.
- Go back to the documentation
- Continue to discover Jelix with the main tutorial


